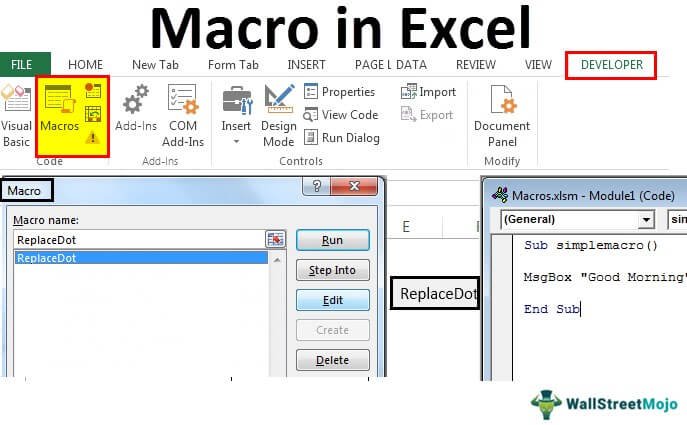
Microsoft Excel is by far the most well-known app out there for creating spreadsheets. Now Excel files look rather innocuous at first with rows and columns full of data, but seasoned Excel users know that the app has some insanely powerful tools that perform some extremely advanced functions. One of the ways to do this is by enabling macros in Excel to reduce manual data entry and to let Excel do what it’s best at. In this guide, we’ll tell you what macros are, how to enable macros in Microsoft Excel and how to use them to enhance your workflow.
What is a macro in Microsoft Excel
Before we tell you how to enable macros, it is important to know what a macro is in Microsoft Excel. In simple terms, a macro lets you automate repeated tasks such as calculating the sum total of marks of students in different subjects. For instance, you have a spreadsheet consisting of a list of students with their scores listed in different subjects. Now, instead of calculating the total marks of each student one by one, you can record a macro by performing the task on one student and then you can easily automate the same thing with other students by simply running the macro.

Security risks of running macros
Of course, macros are really useful and they make our life easier by automating repeated tasks yet there are huge security risks involved while running macros from unverified sources. While it should be absolutely fine running a macro that you created yourself, the same can’t be said for the ones you download online. You should understand that a malicious macro can even delete important files stored on your computer. There’s always a security risk involved when you turn on the enable all macros setting. That’s why it is always advised to enable macros whenever they are needed and naturally you should keep them disabled when not in use.
How to enable macros in Microsoft Excel
Now, let us learn how to enable macros in Microsoft Excel. Follow these steps.
- Considering you have already created a spreadsheet on Excel, click File and go to Options.
- Click Customize Ribbon and under Main Tabs, check Developer. Doing this, the Developer tab will appear on the main screen.
- So, once this is done, click Trust Center > Trust Center Settings > Macro Settings. This is where you choose the fourth option, Enable all macros that always let you run macros. However, make sure that whenever you do not need to for using macros, choose the second option: Disable all macros with notification.
- 1:Now, go back to the main page and click Developer.
- 2:After this, you click on Record Macro > enter the macro name > enter its shortcut key > choose where you want to store the macro i.e. in the current workbook or as a common macro in your Personal Workbook > Hit OK.
- 3:Next, you can start recording the commands. Once done, hit Stop Recording.
- 4:Similarly, if you’re using MS Excel on a Mac, you need to repeat the same steps mentioned earlier. Also, the good part about enabling macros while using 5:Excel on a Mac is that the Developer tab is already present in the toolbar up top. Unlike Windows 10, you don’t need to dig into settings and enable it specifically.
- 6:So now, whenever you run the macro by hitting the assigned shortcut key while working on your spreadsheet, the same task will be performed that you recorded earlier. You can do this as many times as you want.
- 7:To check all your stored macros, you will have to click Macros. Once you do this, you can access a bunch of other settings related to macros such as edit, delete, run etc.
- 8:Besides, to quickly access the security settings for macros, click Macro Security and as we suggested that once you are done using macros, check the second option.

